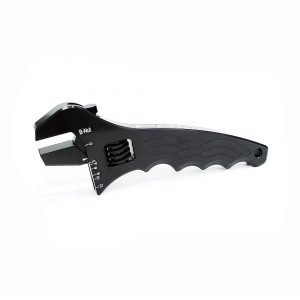
Tools
What is a flaring tool for?
Every vehicle is made up of various systems, all working together in unison to keep it operating smoothly. The fuel system, oil cooling system and braking system are all very essential components for the vehicle’s performance. However, other systems and units like pipes and hoses may not come to mind when thinking of car maintenance or even replacements, but play just an integral part in the vehicle’s overall performance. And to service, these systems like metal piping, specific tool, and equipment are required for any mod or finishing touches you may need in fixing your vehicle. Also, certain tools with specifications also ensure that you or whoever is handling your vehicle does a proper and decent job of doing so.
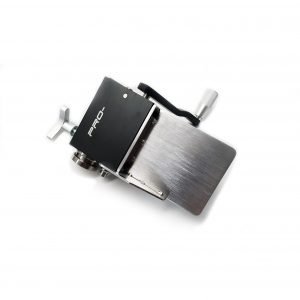
One such tool that is integral for servicing metal pipes within the vehicle is the flaring tool. A flaring tool is a piece of equipment that’s meant for modifying pliable pipe material and is meant to be used on pipe fittings. The flaring tool expands the end of the pipe sections, allowing it to fit unto the next section. This type of tool has been around since the dawn of metallurgy and has become a piece of integral equipment in metalworking. Because of its simplicity, not much technical know-how is required in its usage, allowing it to be utilized in various fields that include such metalwork whether in DIY hobbyists or in automobile applications.
How does a flaring tool work?
The basic function of flaring tools is to make pipe fittings possible. Flaring tools are known for their ability to structure tight fittings. Just like its non-automotive counterpart, flaring tools are meant to make pipes and lines fit unto each other. In vehicles, however, a flaring tool is used to assist in fitting pipes and hoses like that of the fuel, cooling, braking and transmission lines. The main difference between flaring tools meant for vehicles and those for other industries is the preset sizes that vary for each craft.
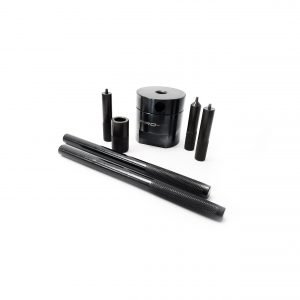
Types of flaring tools
It is important to consider that even if there are different types of flaring tools, each one is made up of three main parts. These include a metal bar with preset sized holes to fit various sizes of pipes and tubes, a screw with a handle meant to enter pipes and tubes and expend them, and a rotating handle.
-
- Single/Double Flare Tool – A wingnut type of flare tool, it is the most common, cheapest and most convenient of the lot. Although these can be used in automotive modifications, they require numerous mobile parts and can be difficult to obtain a perfect flare each time.
- Universal Hydraulic Flare Tool – Once set up, it is a single-handed tool that gives perfect flares almost every time. This type of flare tool is easy to use and has the largest selection of flares including 45-degree automotive flares and GM PTC fittings. Only downsides are that it can be expensive and there is a tendency to over flare certain pipes and hoses.
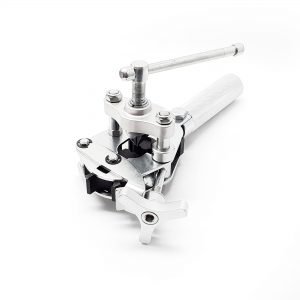
How to use a flaring tool
For flaring lines, you can either use a single or double flare tool.
-
-
- Cut the pipe or tube to the length you want – Use a tube cutter to do so and remove any excess buzz at the end, then slide the tubing nut unto the tube.
-
- Insert tube in the hole of the desired size – Loosen the wingnut first before inserting in the tube. Position the corresponding adapter upside down beside the end of the tube that’s sticking out and match the thickness of the adapter’s larger part. Then, make sure to tighten the wingnuts.
-
- Turn the adapter right side up – Lubricate with a bit of brake fluid and insert into the tube.
-
- Position flaring tool – Place the flaring tool on the tubing clamp with the pointy part of the screw is in the center of the adapter. The flaring tool needs to be locked on the tubing clamp.
-
- Turn the screw clockwise – Do this until you see the adapter’s other end coming out of the tubing clamp. Tighten once more using a vise if available.
-
- Remove adapter – Do so by loosening the screw first. The end of the line will feature a bubble-like facade.
-
- Place the flaring tool at the center where the point enters the line or pipe’s end – Tighten the screw clockwise until the cone is completely bottomed out.
-
- Remove flaring tool and the pipe from the clamp – Once the tool is removed, check your flared pipe for any cracks and gaps. The flare needs to be even around the pipe’s circumference. If there are any cracks, do not use the pipe or hose.
-
What is a tube bender and how to use it?
A tube bender provides accurate bends that are consistent all throughout and can do so on even some of the toughest metals like copper, aluminum, and steel.
-
-
- Have the bender set-up – After choosing the right bender for the appropriate task, adjust the dial according to your desired radius.
-
- Mark the tube – Place a mark on the tube of what direction you plan to bend it towards along with its reference points.
-
- Align tube and insert – Once you’ve aligned the tube, insert it in the bender. Swing the first arm up to be able to insert the tube. However, be sure that reference marks and directional marks can still be seen.
-
- Bend – Bend the tube slowly by bringing down the arm until you reach the mark you placed earlier. Lower the second arm latch if needed once the tube is inserted to hold it in place while more adjustments are made.
- Detach tube from the bender – Once the tube has been bent, unlatch the tube with the arm and remove it from the bender.
-
For any tools and equipment you may need for your vehicle to keep it in top shape, Prospeed Parts has a vast selection of whatever you’ll need for future maintenance and repairs.